Tijdens een etentje bij Broadway, een van onze lievelingsrestaurants aan de Oudegracht in Utrecht, zagen mijn vriend en ik opeens zo’n gaaf idee: Lampen die zijn gemaakt van een hoge hoed en een bolhoed! Simpel en toch origineel. We waren al maanden op zoek naar een toffe lamp voor bij zijn leesstoel, dus konden niet wachten om aan dit nieuwe project te beginnen!
During a dinner at Broadway, one of our favorite restaurants at the Oudegracht in Utrecht, my boyfriend and I saw such a cool idea: Lamps made from a top hat and a bowler hat! Simple yet original. We had been looking for a nice lamp to hang above his reading chair for months, so we couldn’t wait to start with this new project!
[English below…]
Wat heb je nodig?
- Hanglamp pendels
- Hoge hoed en bolhoed
- Filament LED lampen
- Platkop schroevendraaier
- Potlood
- Zwart isolatietape
- Boor, schroefhaakjes, pluggen, etc.
Eventueel:
- Aansluitsnoer met stekker
- Voetschakelaar

Wat moet je doen?
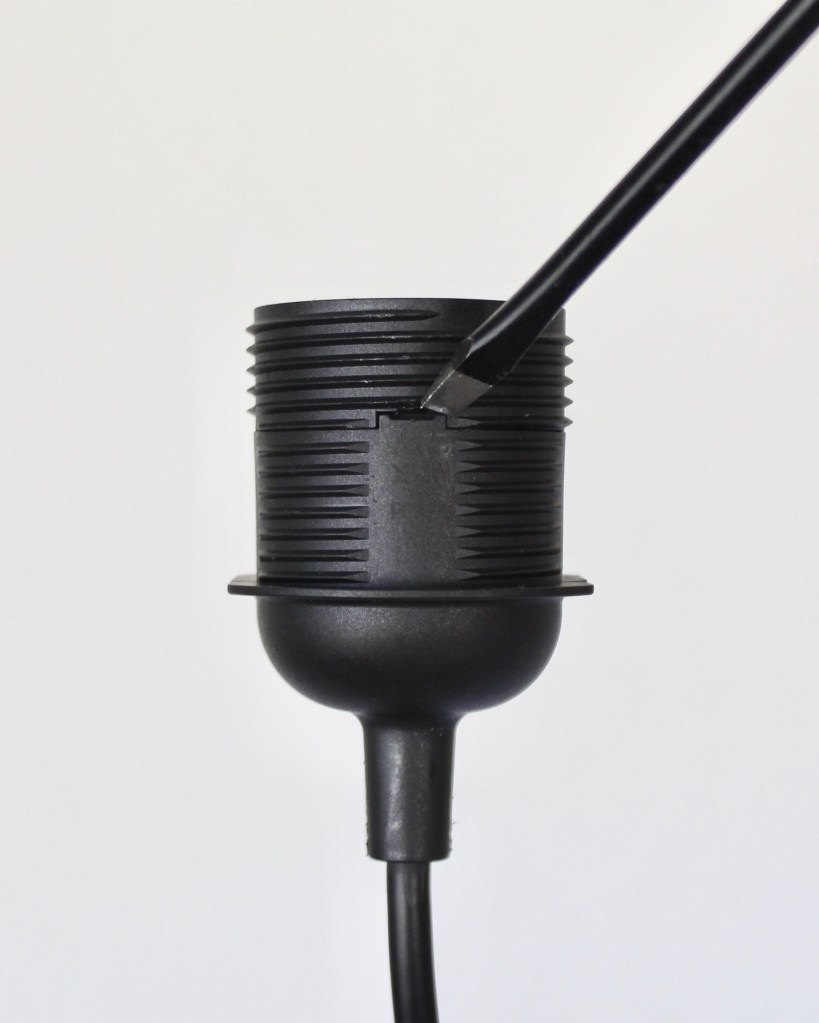
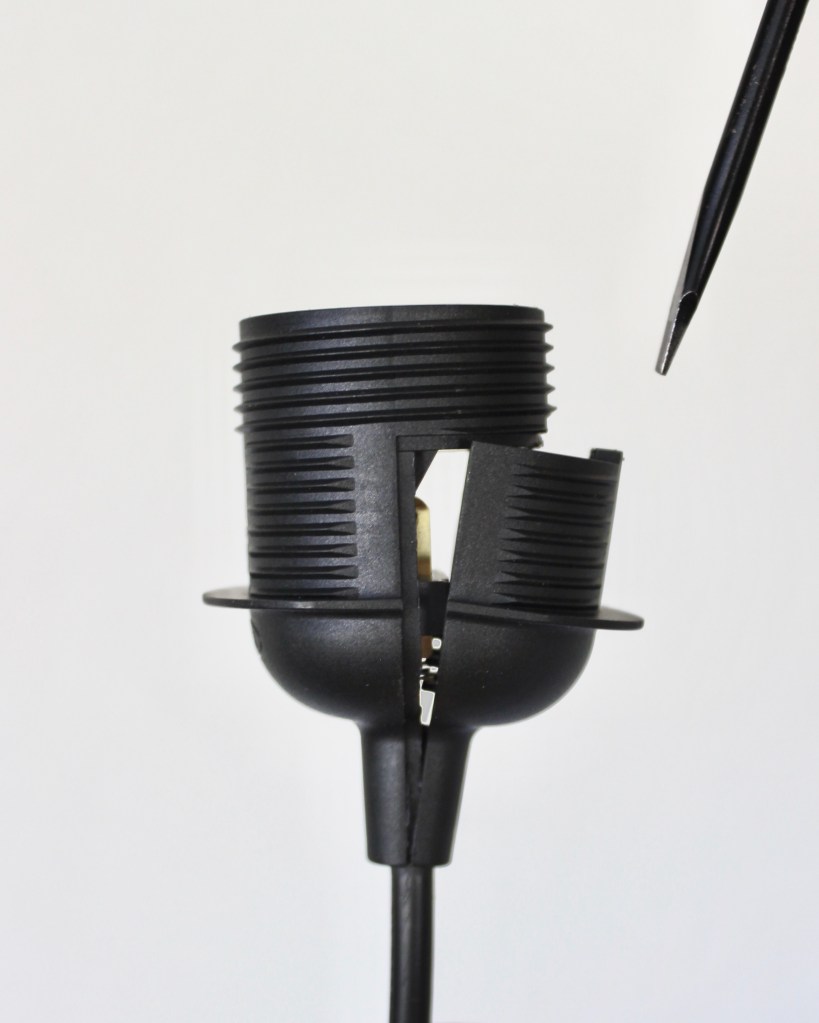
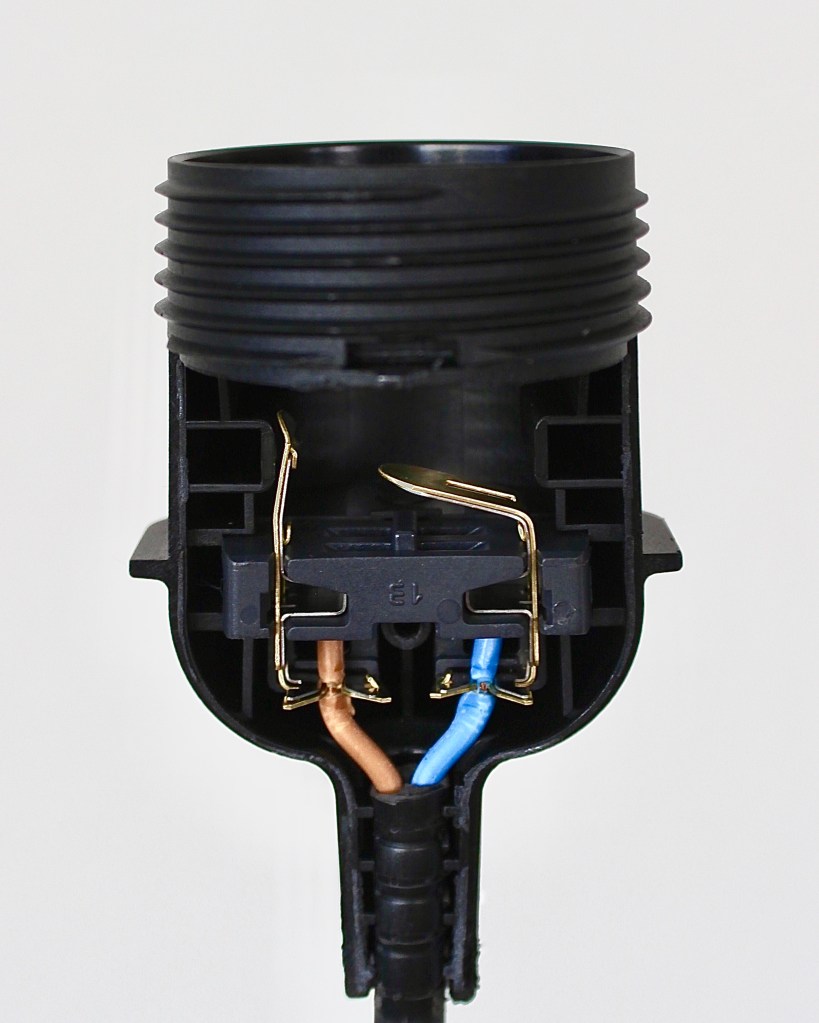
- Open voorzichtig de lampfitting met een platkop schroevendraaier en haal de stroomdraad eruit. Mijn pendels kwamen bij Ikea vandaan.
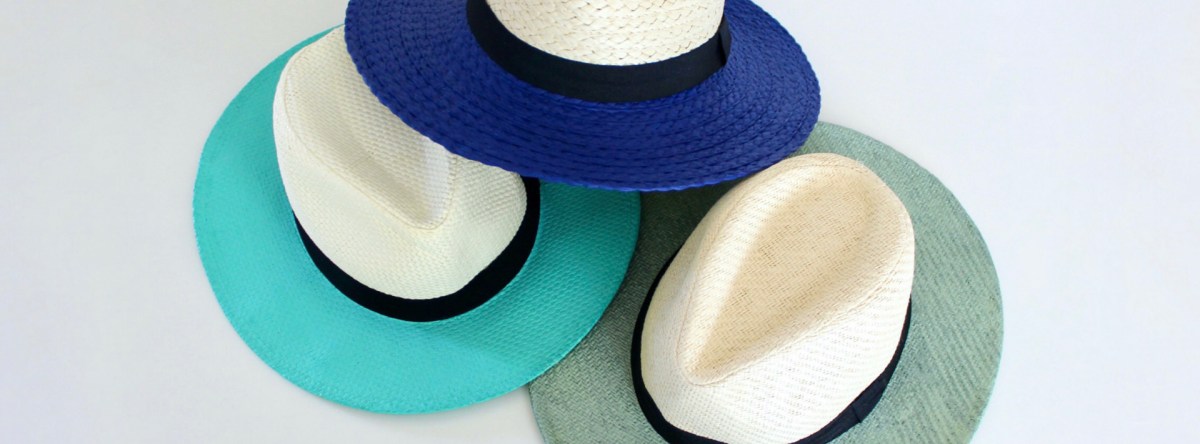
- Maak een klein gat in het middelpunt van de hoed. Mijn hoedjes waren gewoon van de feestwinkel en na een beetje duwen met een potlood was ik er zo doorheen.
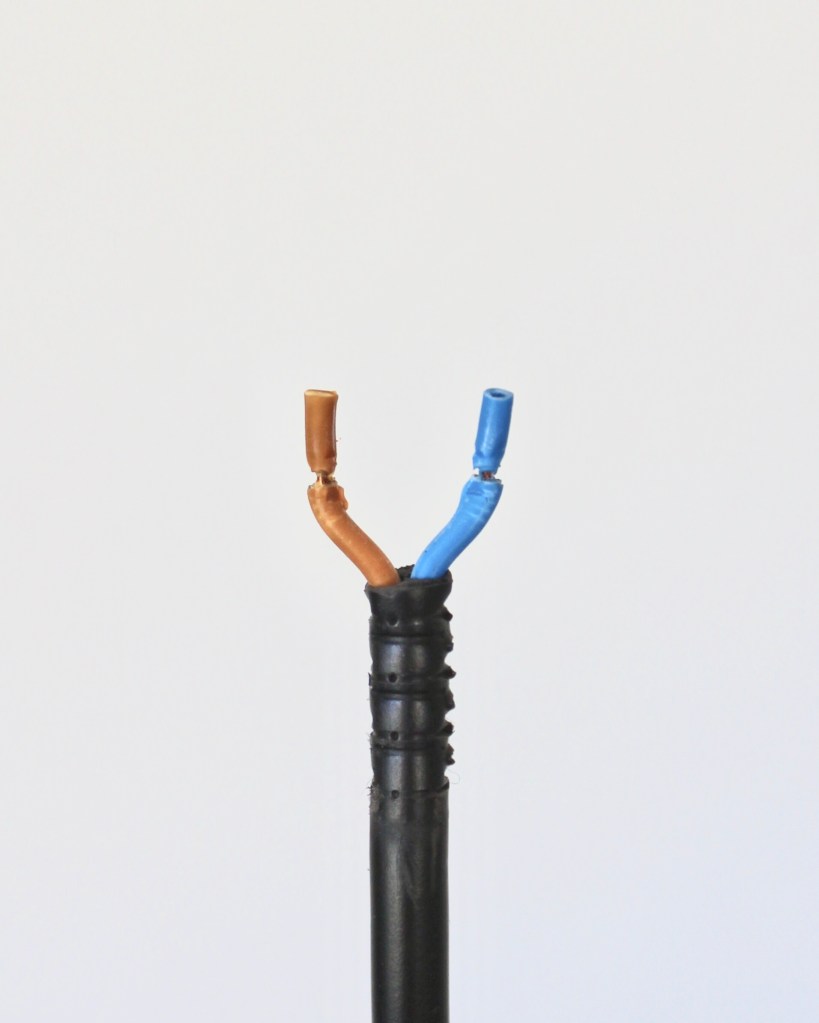
- Rijg de stroomdraad van boven naar beneden door de hoed.

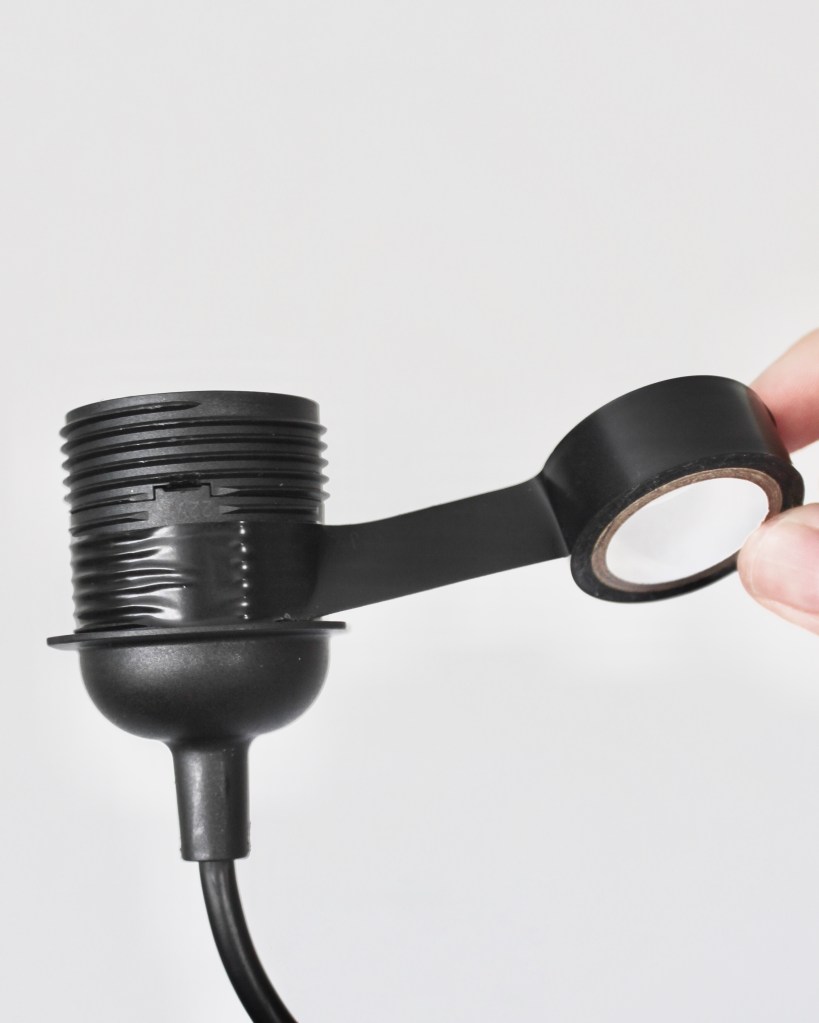
- Stop de stroomdraad terug in de fitting en klik hem dicht. Wij hebben voor de zekerheid ook nog isolatietape gebruikt om het extra goed te sluiten.
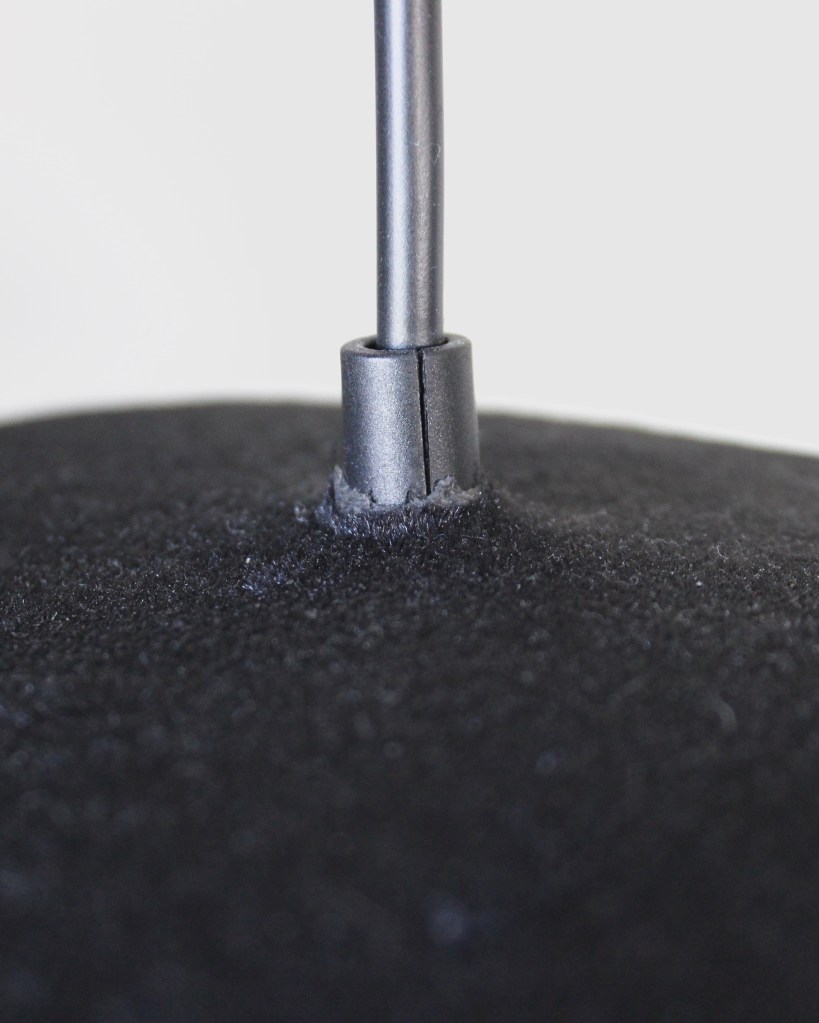
- Duw nu het dunste stukje van de fitting zo ver mogelijk door het gat van de hoed. Bij mij bleef alles meteen stevig en recht zitten, maar als dat niet het geval is, kun je natuurlijk altijd nog een beetje lijm gebruiken. Pas wel op dat het niet in de fitting terecht komt!
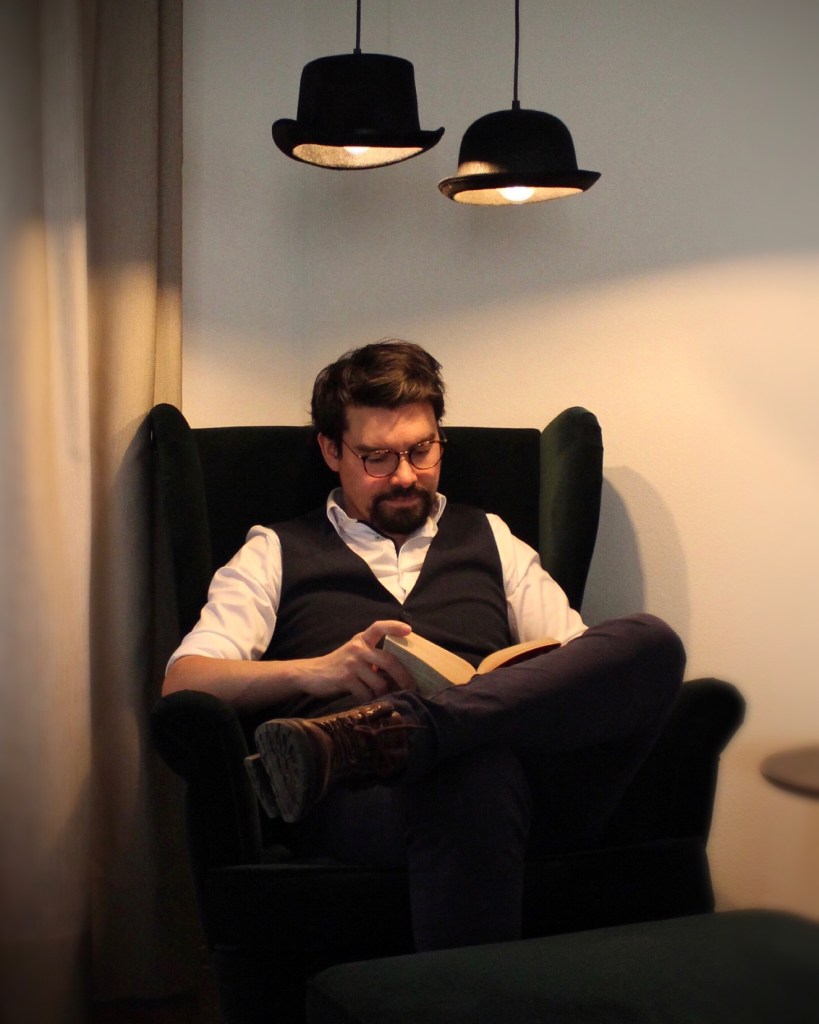
- Stel de juiste lengtes van de pendels af. Dit is uiteraard afhankelijk van de door jou gekozen plek en wat je het beste vindt passen bij de rest van jouw interieur. Zelf vond ik het bijvoorbeeld leuk als de hoedenlampen wat lager en niet op dezelfde hoogte zouden hangen, maar wel nét hoog genoeg zodat we ons hoofden er niet aan kunnen stoten als we opstaan uit de leesstoel.
- Bevestig de hanglampen aan het plafond, volg hiervoor de bijgeleverde instructies, (in mijn geval dus de handleiding van Ikea).
- De plek waar wij de hanglampen hebben opgehangen had geen stroompunt(en) in het plafond, daarom heeft mijn vriend er een voetschakelaar aan bevestigd, met een parallelschakeling tussen te twee lampen zelf. Alle benodigdheden hiervoor hebben we bij Gamma gekocht. Doet dit alleen als je er verstand van hebt! Ben jij niet zo handig? Neem geen risico’s en vraag de hulp van iemand anders!!!

- Draai als laatste de gloeilampen erin, zet ze aan en…
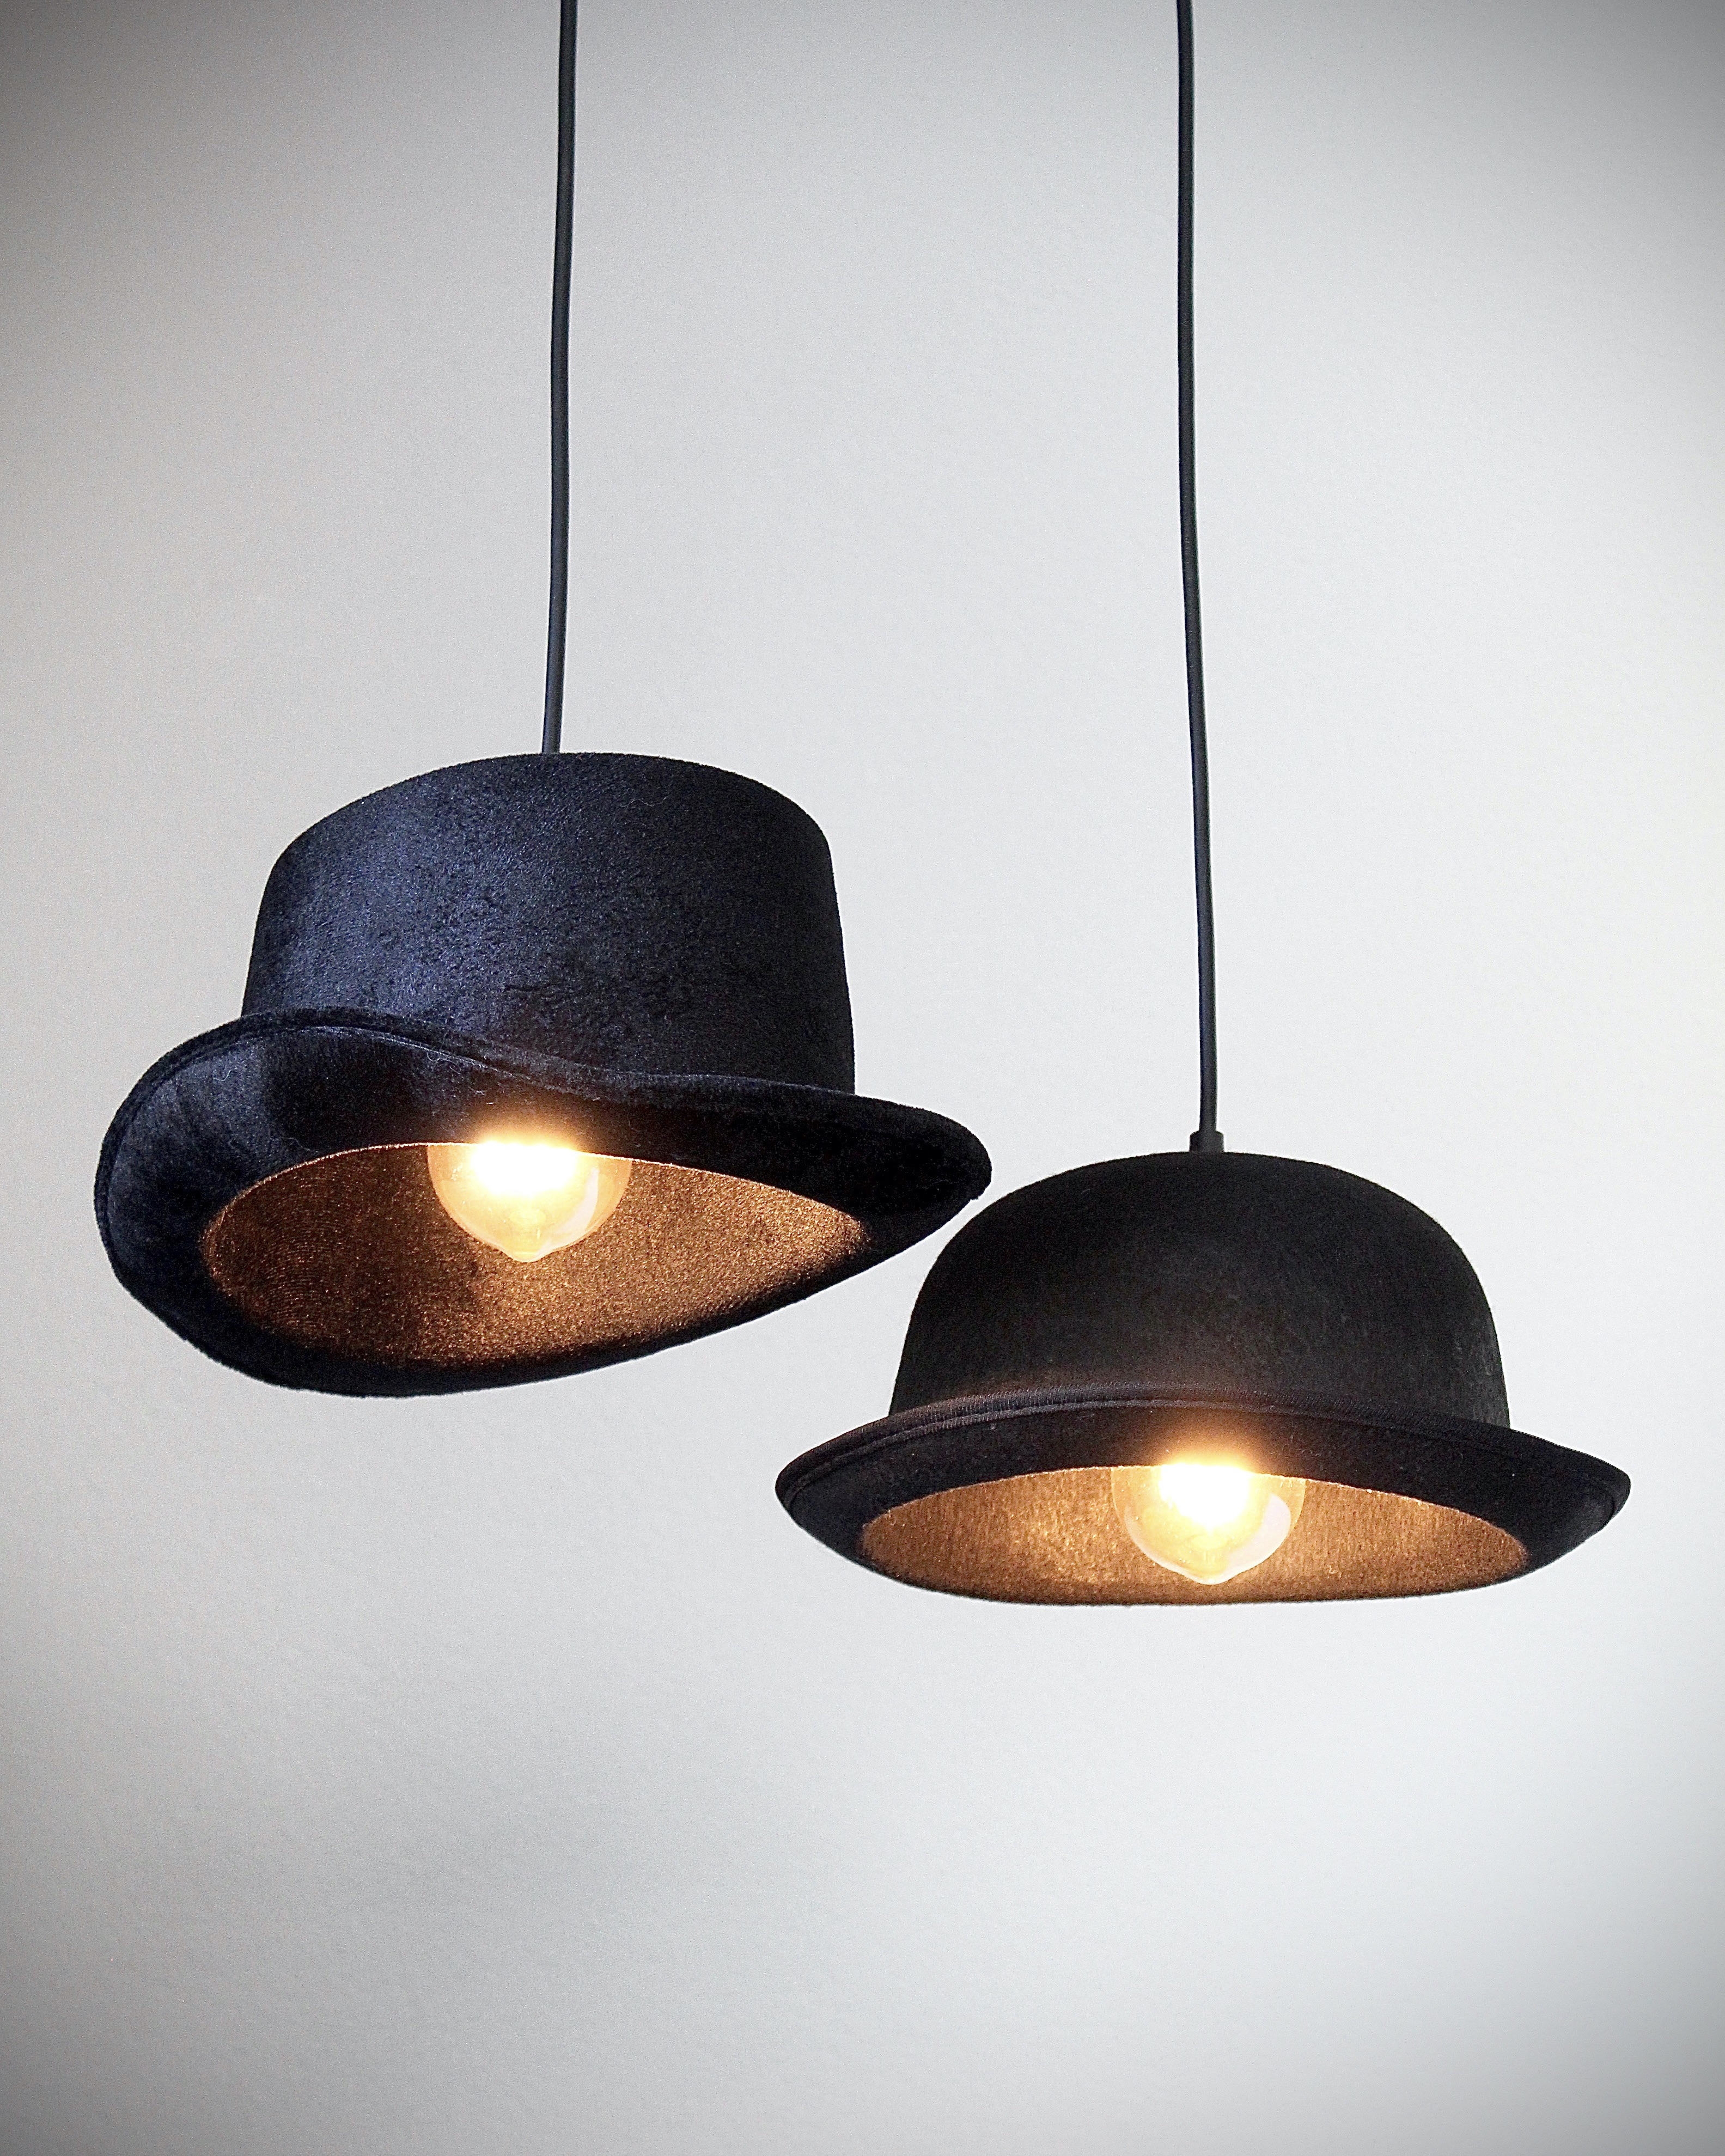
Kijk ze shinen!!! 💡 Mijn filament LED lampen zijn van Action en creëren in combinatie met de hoedjes meteen een gezellige, warme ‘vintage’ sfeer in huis!
Aangezien de hoedjes zwart zijn, wordt het licht deels geabsorbeerd. Mocht jij het eindresultaat nou niet fel genoeg vinden, kun je uiteraard ook sterkere lampen gebruiken of bijvoorbeeld de binnenkant goud maken met glitters, zodat het licht beter reflecteert.
Ik hoop dat jullie het leuk vonden om te zien hoe je deze DIY kunt maken!
Vind jij dit soort lampen ook zo’n gaaf idee? En wat voor hoedje(s) zou je zelf gebruiken?
Reageer onder deze post of ga naar contact en stuur me een mailtje.
Deel jouw foto’s van de DIY met de hashtag #irenitalaverde en tag @irenitalaverde. Ik ben benieuwd naar het eindresultaat!!!
“Maak van elke dag een sprookje!” – Irene
What do you need?
- Pendant light cords
- Top hat and bowler hat
- Filament LED light bulbs
- Flat head screwdriver
- Pencil
- Black electrical tape
- Drill, screw hooks, plugs, etc.
Potentially:
- Electrical cable with plug
- Footswitch
What do you have to do?
- Carefully open the lamp socket with a flat head screwdriver and take out the power cord. My pendant light cords came from Ikea.
- Make a small hole in the center of the hat. I used hats from a party store and only needed to push through the material for a bit with a pencil.
- Thread the cord through the hat from top to bottom.
- Put the cord back into the socket and snap it shut. To be on the safe side, we also used some electrical tape to close it even more firmly.
- Now push the thinnest part of the socket as far as possible through the hole of the hat. When I did it, everything immediately stayed into place, but if not, you could always fixate the hat with a little drop of glue. Please do be careful that it does not end up in the socket!
- Adjust the length of the pendant light cords. How long? That of course depends on the location you have chosen and what you think fits best with the rest of your interior. For example, I liked it if the hat lamps would hang a bit lower and not at the same height, but just high enough so that we cannot hit it with our heads when we get up from the reading chair.
- Attach the lamps to the ceiling, following the instructions (in my case the manual from Ikea).
- The place where we hung the lamps had no power point(s) in the ceiling, so my boyfriend attached a foot switch to them, with a parallel connection between the two lamps. We bought all the necessary supplies from Gamma. Only do this if you know how! Not that handy yourself? Don’t take chances and ask someone else for help!!!
- Last but not least, screw in the light bulbs, turn them on and…
Look at them shine!!! 💡 My filament LED light bulbs are from Action and in combination with the hats immediately create a cozy, warm ‘vintage’ vibe in our home!
Because the hats are black, the light is partially absorbed. If the end result is not bright enough for you, you can of course also use stronger lamps or for instance make the inside gold with glitter, so that the light reflects better.
I hope you enjoyed reading how to make this DIY!
Do you also think this type of lamps is a cool idea? And what kind of hat(s) would you use?
Comment below this post or go to contact and send me an email.
Share your photos from the DIY with the hashtag #irenitalaverde and tag @irenitalaverde. I am curious about the end result!!!
“Turn every day into a fairytale!” – Irene